Creating and Editing a Location
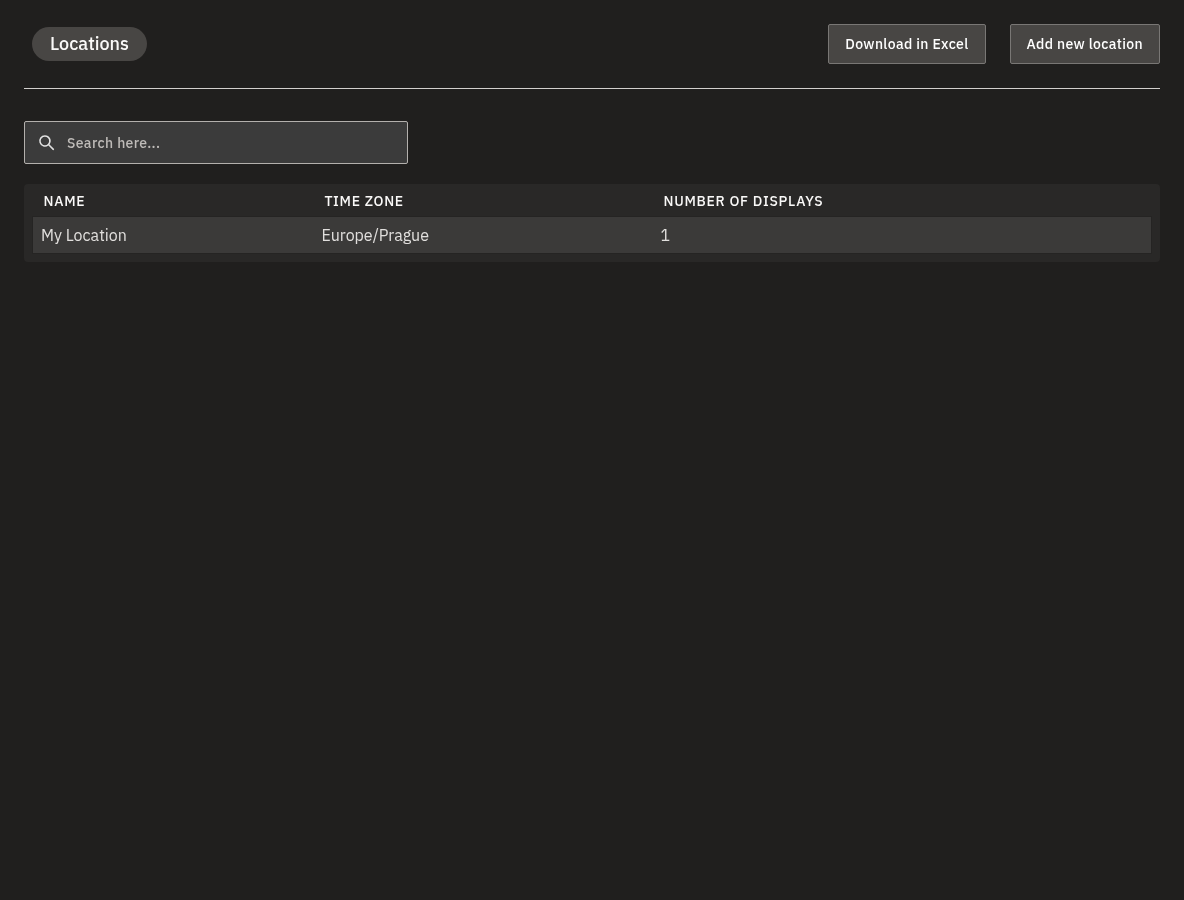
A Location is a real place — a store, an office, or a site — where your displays live. Its most important job is to hold the Time zone and the weekly business hours for that place. Every display you assign to a location inherits those settings, so your content is scheduled in the location's own local time and the screen can go idle (sleep) when the place is closed.
This article walks you through adding a location, choosing its time zone, assigning displays, dropping a pin on the map, recording on-site network details for your IT team, duplicating a location, and deleting one.
💡 Set the time zone early
Both the Name and the Time zone are required. Your displays use the time zone to decide when to play content and when to sleep, so getting it right from the start spares you surprises later.
Add a new location
- Click Add new location. You can do this from the Locations list or from any location's detail page.
- In the slide-over panel, type a Name.
- Pick a Time zone from the grouped list — the Name and the Time zone are the two required fields. The picker is organized by continent (Africa, America, Asia, Europe, and so on), and your device's detected local time zone is offered as a quick option at the top.
- Optionally, open the Display(s) field and select one or more displays to assign them to this location.
- Optionally adjust the weekly hours. New locations start as open 24/7 (nonstop) on every day.
- Click Add new location to create it. You are taken straight to the new location's detail page, where you can finish adding the address and other details.
Naming rules
The Name must be unique within your department — two locations in the same department can't share a name. If you try to save a name that's already in use, the save is rejected.
Set the address and map pin
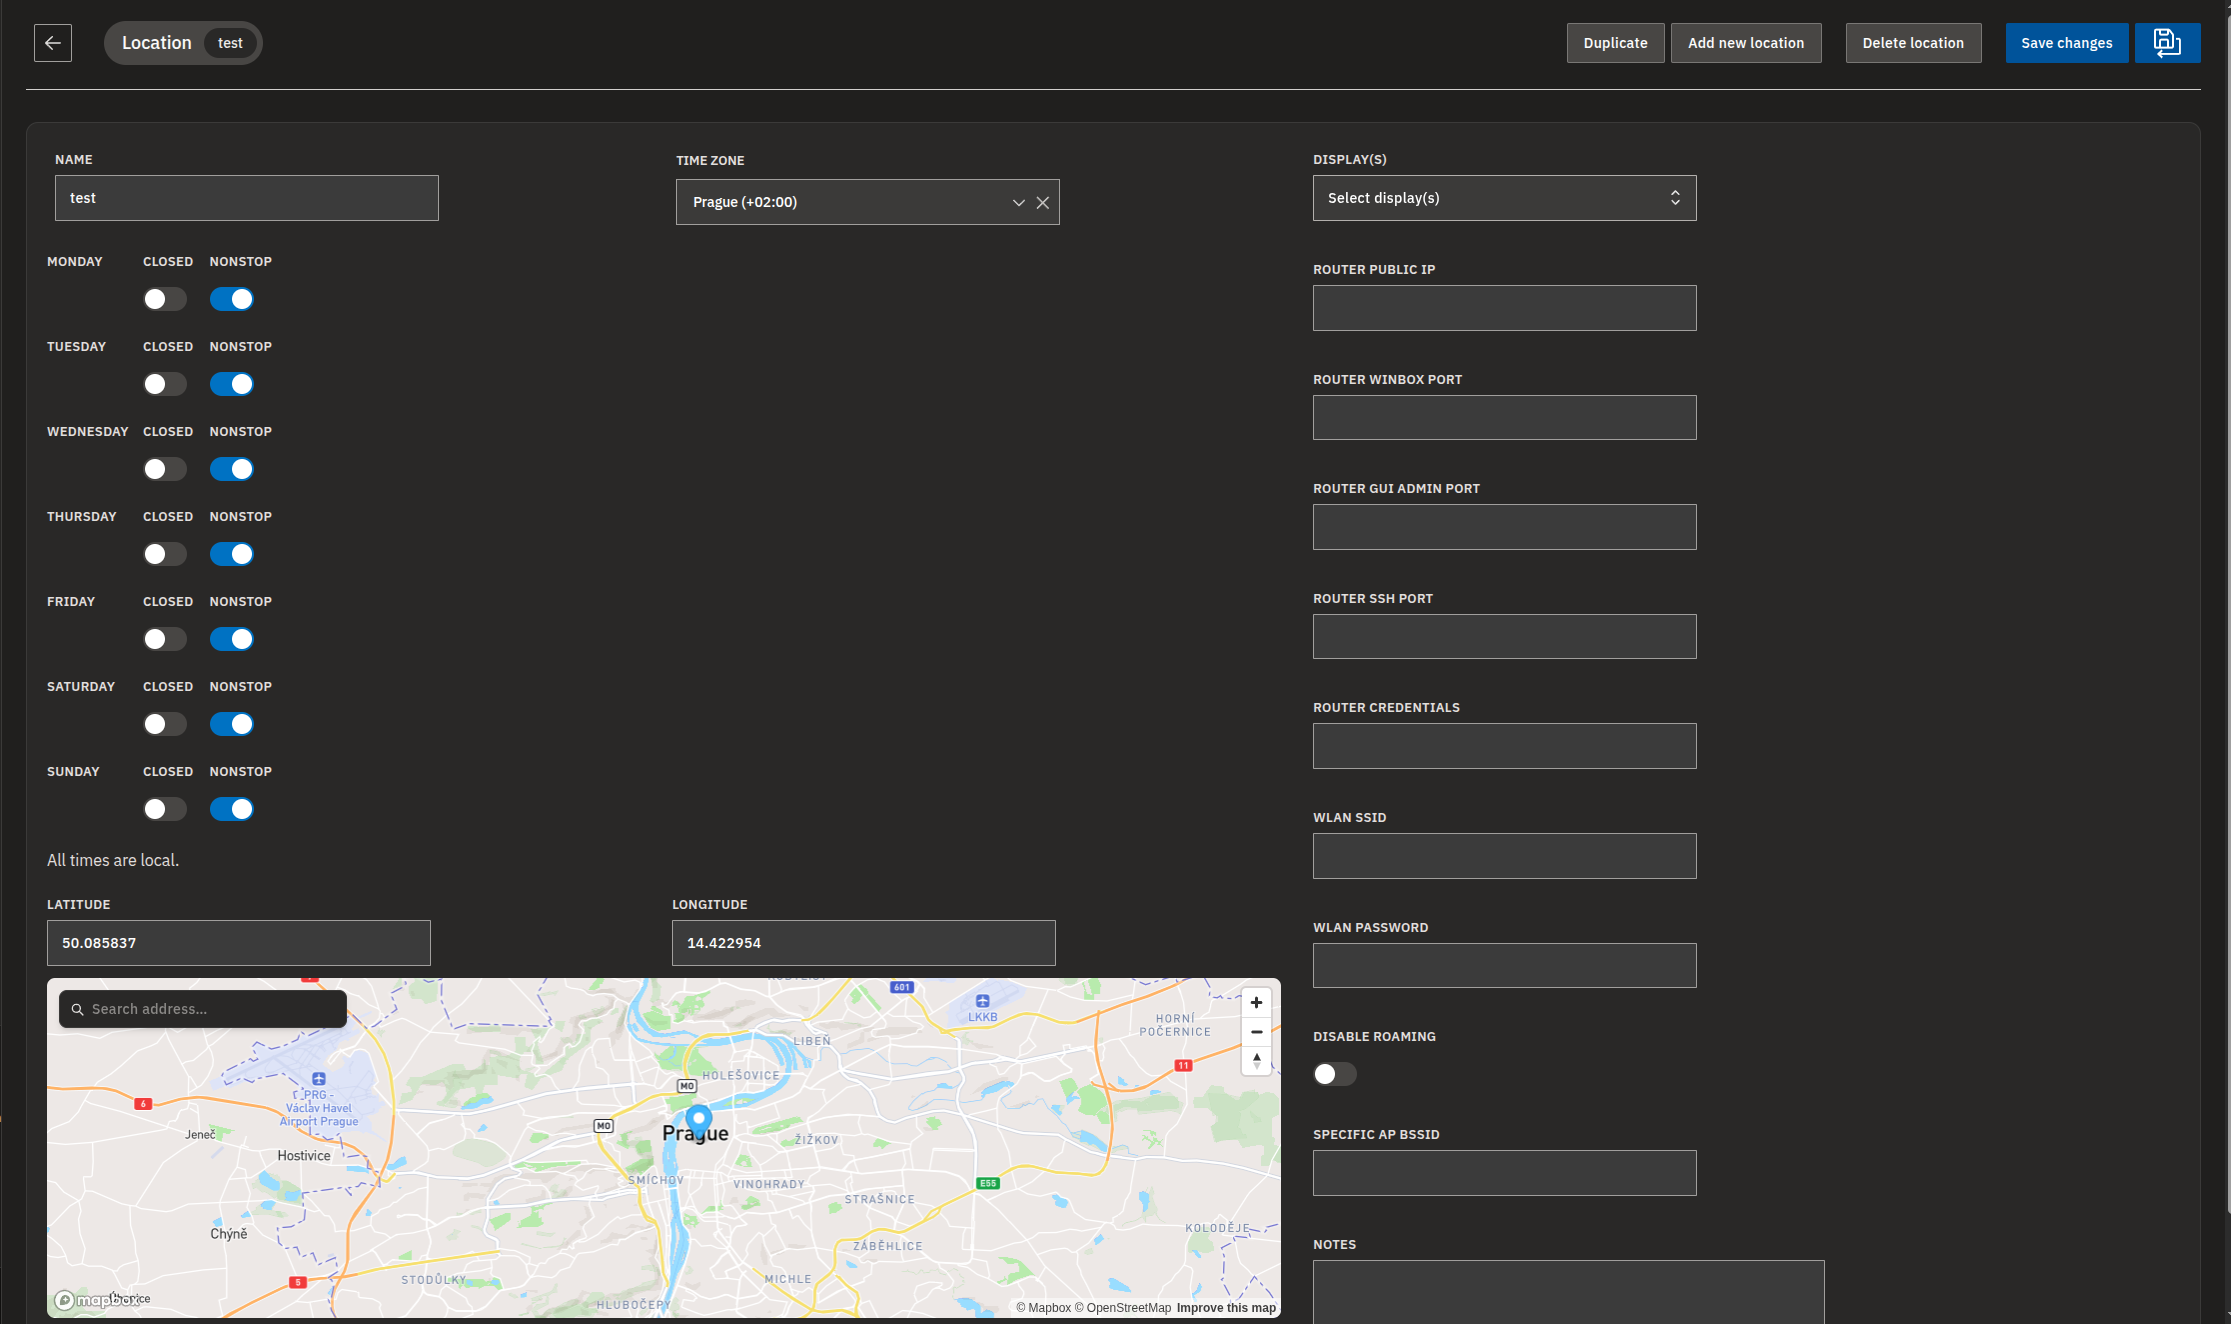
The map lets you mark exactly where the location is. You'll find it on the location detail page, below the weekly hours.
There are several ways to set the pin:
- Type into the Search address… box and click a matching result to drop the pin.
- Or click anywhere on the map.
- Or drag the existing marker to the right spot.
- Or type values directly into the Latitude and Longitude fields. Latitude must be between -90 and 90; longitude must be between -180 and 180.
When you're happy with the pin, click Save changes.
Fill in both coordinates, or neither
Provide both Latitude and Longitude, or leave both empty. Filling in only one blocks the save.
💡 Better address matches
The address search returns results near the part of the map you're currently viewing. If you don't see the right match, pan the map closer to the area you're looking for and search again.
Map needs WebGL
The map needs a browser with WebGL (graphics acceleration) to draw. Without WebGL the map won't render, but you can still type the Latitude and Longitude in by hand.
Assign displays to a location
Assigning displays is how a screen learns which time zone and hours to follow.
- Open the location detail page (or the Add new location panel).
- Click the Display(s) field and search for the displays you want at this location and select them.
- To remove a display, click it again or use the remove control in the field.
- Click Save changes. The assigned displays now inherit this location's time zone and hours.
Once saved, the screens assigned here appear under Connected displays, listed below the form on the location detail page, so you can confirm what's attached at a glance.
One location per display
A display belongs to exactly one location at a time. Assigning a display here moves it to this location and removes it from any previous one.
For more on setting up the screens themselves, see Creating and Configuring Displays.
Record on-site network / IT details
Each location has an optional section for on-site network information. These fields are reference notes for your IT and admin team — they exist purely for your own management convenience, so the site's network details live in one place. The signage system doesn't use them for anything: they don't affect how or when your content plays, and you can leave them all empty.
- On the location detail page, use the network section to record:
- Router Public IP
- Router Winbox Port
- Router GUI Admin Port
- Router SSH Port
- Router Credentials
- WLAN SSID
- WLAN Password
- Disable Roaming
- Specific AP BSSID
- Notes
- Enter the values your IT team provides. Each port field needs a valid port number, and Router Public IP must be a valid IP address, or the save is rejected. Notes allows long free text.
- Click Save changes.
These fields are sensitive
The network section can hold router access details and passwords, sometimes in clear text. Treat this information as confidential and for IT use only. The Locations Excel export can include these same credentials, so be careful about who you share it with.
Save or discard changes
- Make your edits on the location detail page.
- Click Save changes to save and stay on the page, or Save and go back to save and return to the previous page.
If you try to leave the page with unsaved edits, you'll be asked whether to save or discard them.
Duplicate a location
Duplicating is a quick way to set up a similar location without retyping the hours.
- Open the location you want to copy.
- Click Duplicate in the page header.
- An Add new location panel opens, pre-filled with the Name plus " (copy)", the same Time zone, and the same business hours.
- Adjust the Name and anything else you need. You'll need to re-assign displays and re-enter the address and network details — these are not copied.
- Click Add new location to create the duplicate.
What Duplicate copies
| Copied | Not copied |
|---|---|
| Name (with " (copy)" added) | Assigned displays |
| Time zone | Address / map pin |
| Business hours | Network / IT fields |
Delete a location
- Open the location you want to remove.
- Click Delete location in the page header.
- Confirm the deletion when prompted.
- The location is deleted and you're returned to the Locations list.
Deleting is permanent
Deleting a location cannot be undone. In some cases deletion may be blocked; if so, contact your administrator.
Browsing locations read-only
When you're browsing another department read-only, you can see every location but can't change them — see Departments, Users & Roles.
FAQ
What is the minimum needed to create a location? A: A Name and a Time zone. Displays, address, and network details are all optional at creation — assigned displays use the time zone for scheduling and idle behavior, so pick the zone where the screens actually are.
Why can't I save my location? A: The most common cause is filling in only one of Latitude or Longitude — you must provide both or leave both empty. Also check that the Name is filled in and not already used by another location in your department, and that any router ports are valid port numbers.
What hours does a brand-new location have? A: Every day starts as open 24/7 (nonstop). You can change this on the location's hours section — see the Business Hours article for details.
What does Duplicate copy? A: It copies the Name (with " (copy)" added), the Time zone, and the business hours into a new Add new location form. It does not copy assigned displays, the address/map pin, or any network/IT fields.
Are the router and WLAN fields used by the signage system? A: No — they're optional reference notes kept purely for your own team. The router IP, ports, credentials, WLAN settings, and related fields do not affect how or when content plays, and the system doesn't use them for anything else. Because they can include passwords, treat them as sensitive.
Why can't I edit or add locations? A: You're most likely browsing another department read-only — you can see locations but not change them. See Departments, Users & Roles.
Need help?
If you're not sure which time zone to choose, can't save a location, or deleted one by mistake, reach out to your Bohemica Signage administrator or support contact. You may also find these related articles useful: